


🚪 Slide into seamless style with Prime-Line precision!
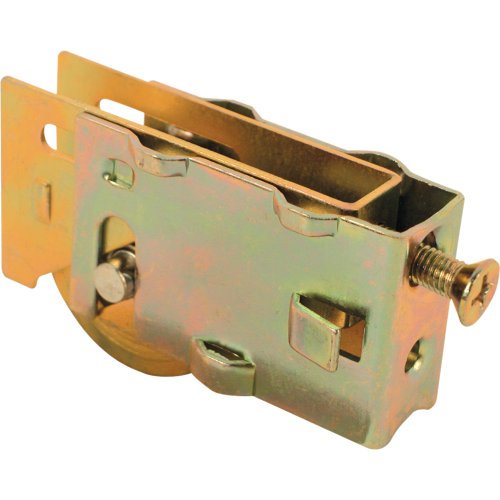
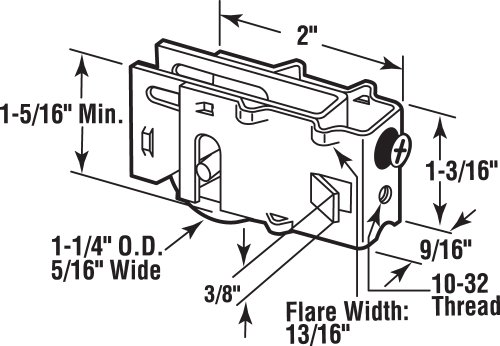
The Prime-Line D 1688 is a 1-1/4 inch steel ball bearing sliding door roller assembly featuring a durable stamped steel housing and rear screw adjustment for precise fit. Trusted by leading patio door manufacturers, it offers effortless sliding performance and quick installation, backed by a 1-year warranty.


| ASIN | B000I1EC2I |
| Assembly Required | No |
| Batteries Included? | No |
| Batteries Required? | No |
| Best Sellers Rank | #126,251 in Tools & Home Improvement ( See Top 100 in Tools & Home Improvement ) #150 in Screen Door Hardware |
| Brand | PRIME-LINE |
| Color | Steel |
| Customer Reviews | 4.7 4.7 out of 5 stars (193) |
| Date First Available | January 16, 2007 |
| Global Trade Identification Number | 00049793016881 |
| Included Components | Sliding Door Roller |
| Is Discontinued By Manufacturer | No |
| Item Package Quantity | 1 |
| Item Weight | 2.39 ounces |
| Item model number | D 1688 |
| Manufacturer | Prime-Line Products |
| Material | Steel |
| Measurement System | inch |
| Part Number | D 1688 |
| Power Source | power_source_type |
| Product Dimensions | 0.56 x 2 x 1.18 inches |
| Size | 1-1/4 in. |
| Style | Classic |
| UPC | 049793016881 |
| Usage | specific_uses_for_product |
| Warranty Description | Goods are warranted against manufacturing defects for 1 year. |
C**N
Perfect Fit
Make sure to look at your old roller as there are many out there. These aren’t exactly made the same but this is a perfect fit after squeezing the tabs together on the end. High quality and has my door back to normal operation. Great value for money! I was able to install in less than 10 minutes.
D**E
Sliding Patio door rollers
Patio door rollers were easy to install and worked great! Was very happy with the quality of the item , the door rolled effortlessly !
B**.
Two Thumbs Up!
Thank you so much, works great!
J**D
It slides like its brand new
When you can't find it at any big box store, then order it from Amazon. Perfect fit for a really old sliding door.
J**E
Great replacement
Great fit for my sliding door installation was easy
D**N
Good replacement for Better Bilt patio doors
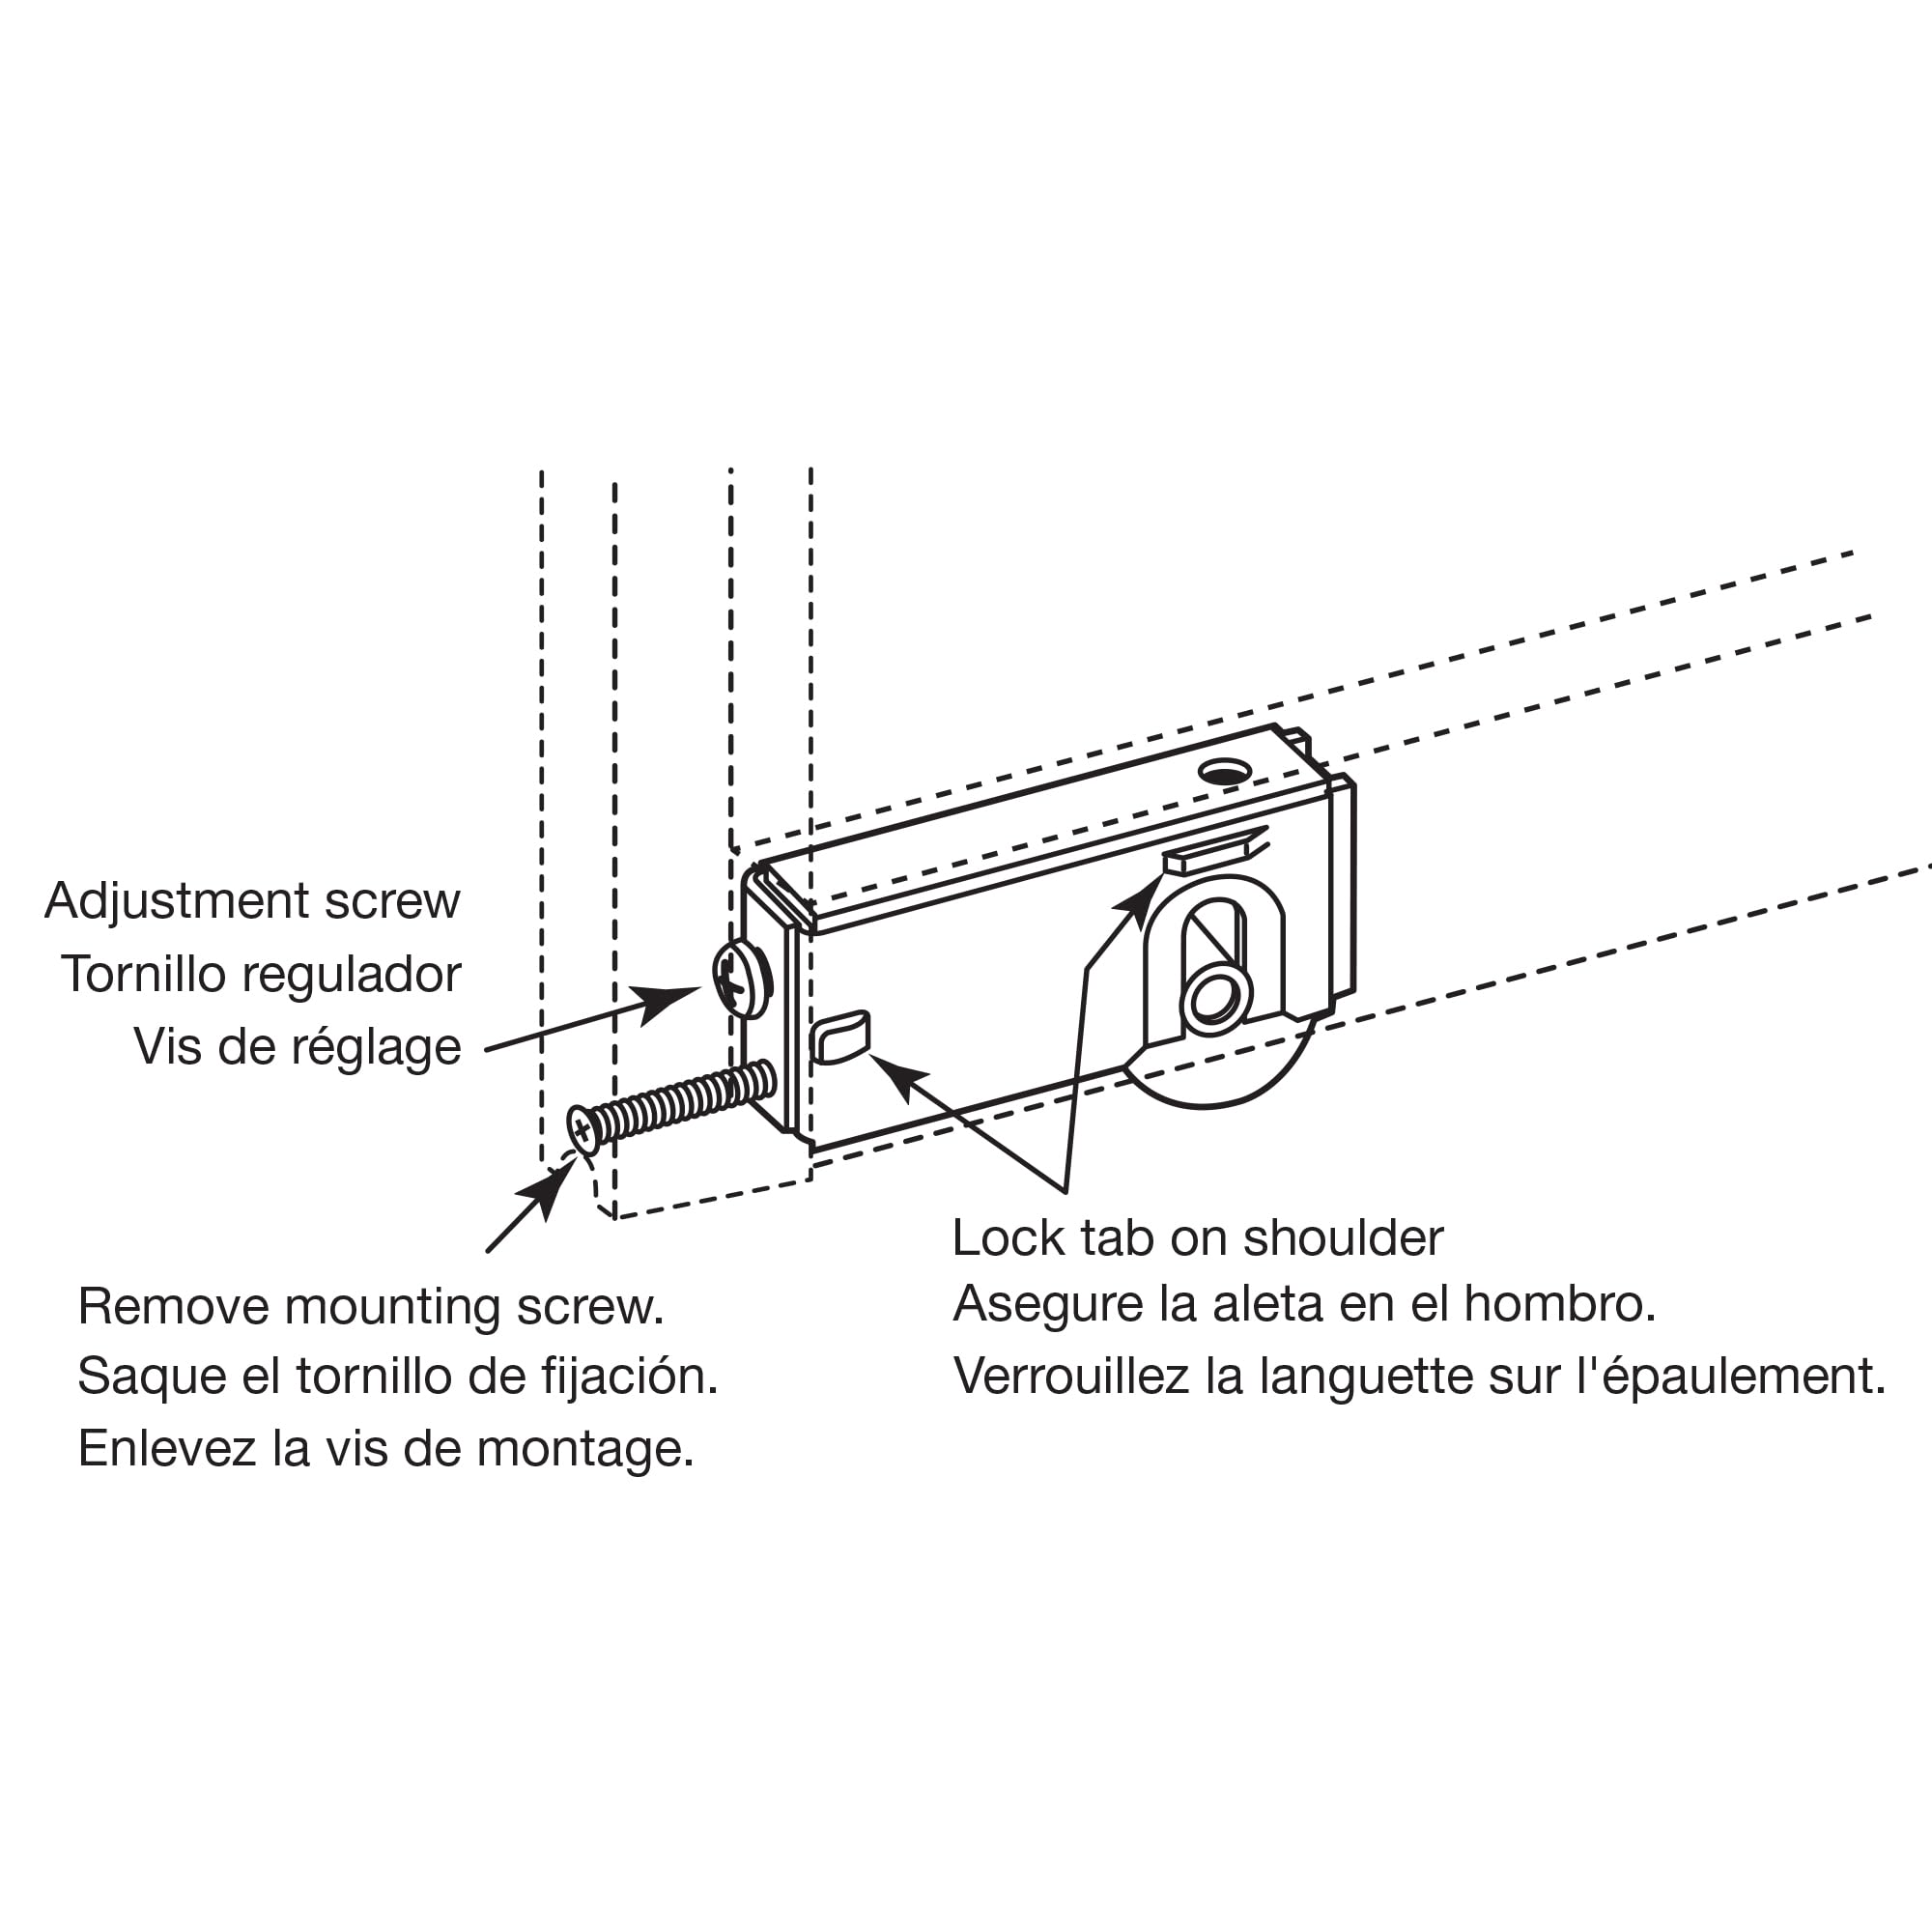
Works well for replacement for our Better Bilt mid 90s patio doors. Like other reviewers have said for this version, you have to take the side rails off but it's not a big deal. USE 2 PEOPLE as the glass is heavy. We found the best is way is: - Lift and remove the door, set flat on carpet or other padded surface - Starting with the non-handle side, unscrew the 2-square head screws, save these - Gently pull the rail from the glass, taking care not to damage the weatherstipping - Follow same procedure for the handle side, then the bottom piece holding the rollers should pull off easily - Using a flathead, push in the retaining clips and pull out the old roller assembly. - Push in the new assembly, be patient working the new tabs in the slots as it will fit, but takes some work - Clean the door housing lower rail, as will be full of gunk - Reassemble the bottom piece to the glass, and the side rails, again making sure you take care of the weatherstipping as slips out of place easy - Set door in and adjust the height using the Phillips top screw of the new assembly - TAKE IT EASY opening and closing the door as it glides with little effort now - Crack open a beer, as you did it!
B**S
Fits early 90's "Better Bilt" aluminum patio door
I have used these rollers to repair the sliding doors in 4 different homes that were built from 1993 to 1995. The homes all have windows and patio doors manufactured by "Better Bilt" corporation. These rollers are nearly identical to the factory original rollers and the bearings are pre-lubricated. They have a three improvements that I can see: 1. A stronger solid axle for the roller/wheel. 2. A square nut to hold the height adjustment screw inside of the roller (the original was threaded into the sheet metal of the roller). 3. A bearing designed to keep dirt and water out better (unfortunately, it's not a sealed bearing). The only negative I can think of is that they aren't packaged and sold in pairs. Here is the installation method I use: The roller is mounted inside of the horizontal bottom section of the door frame, but removal and installation of each roller requires removing the vertical side of the door frame. Removal and installation can be performed without removing the entire door. I have done it both ways, and I recommend not removing the entire door since it is quite heavy and sometimes, the sliding door cannot be removed without first removing the fixed door panel, and that's a lot of work. The main advantage of removing the entire door is being able to thoroughly clean dirt and debris from the track under the door and the bottom section of the door frame. If you are replacing both rollers, then remove and replace only one at a time. - Remove the Phillips head screw that mounts the roller to the vertical frame section. Save this screw since it is not included with the new roller. - Removing the the square-drive security screw at the top and bottom of vertical frame section. - Use a rubber mallet sliding along the glass and gently tap the frame section away from the door until you can pull it the rest of the way off by hand. - Find an old screw about 1-inch long with the same threads as the mounting screws you removed in step 2 and thread it about 1/4" into the mounting screw hold in the roller. I don't recommend using actual mounting screw since it can get damaged in the next step. - (optional) having a second person to hold up the side of the door you're working on about 1/4" will help in the next 3 steps. - Use a locking pliers to grab the screw, then tap on the pliers with a rubber mallet to pull the roller out from the bottom section of the door frame. - Unscrew the height adjustment screw on the new roller until it stops. - Push the roller into bottom section of the door frame until it's flush with the edge of the frame. Use a rubber mallet to gently tap it in in place if you can't push it in by hand, but don't hit the adjustment screw. - Adjust the height adjustment screw on the new roller until it's close to where it normally should be. - Make sure the rubber window seal along the side of the door is in place properly as it likely moved when you removed the side section of the frame. - Push the side section of the frame back in place using a rubber mallet to gently tap it evenly from top to bottom until it's all the way in place. Check to make sure it's oriented correctly with the two holes for the roller mounting and adjustment at the bottom. Make sure the frame section it's aligned vertically as you tap it in place. You can use a piece of stiff wire, or a long narrow screw, or very narrow screwdriver to help keep it aligned with the two security screw holes as you are tapping it in place. - Install the two square-drive security screws. - Install the original Phillips-head roller mounting screw. - Fine-tune the height adjustment - Check for correct operation. Repeat for the roller on the other side of the door
T**C
Tricky, but simple one you do one.
I have 50 year old sliding doors that would not move until I replaced the old rollers with these. It took a bit of figuring to understand how to remove these, but I have a friend who helped me figure it out. Now my doors roll BEAUTIFULLY!
K**Y
Works great
Trustpilot
2 weeks ago
1 week ago