


TP1822
Product ID: 651083952
Details
- BrandTupavco
- ColourSilver
- Compatible devicesChassis Server
- MaterialMetal
- Size2U tot 8U x x
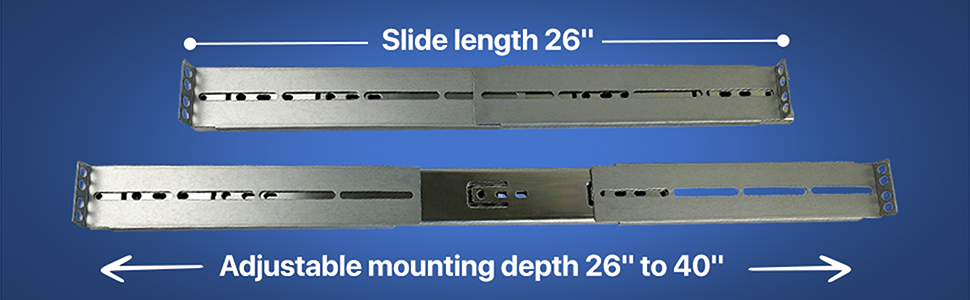
📏Adjustable depth 26"–40"
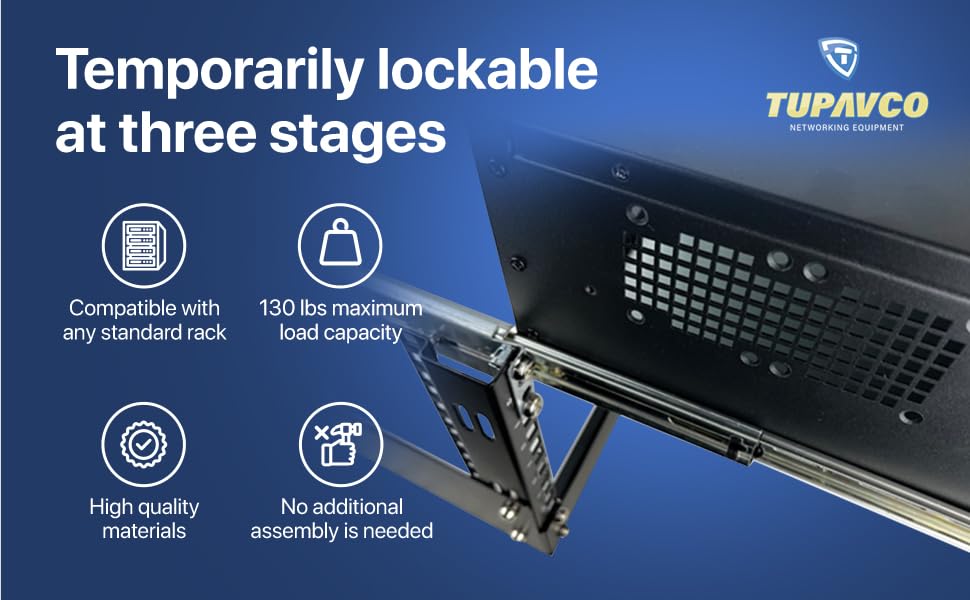
↔️52" total slide length
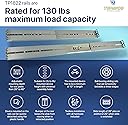
⚖️130 lbs max load
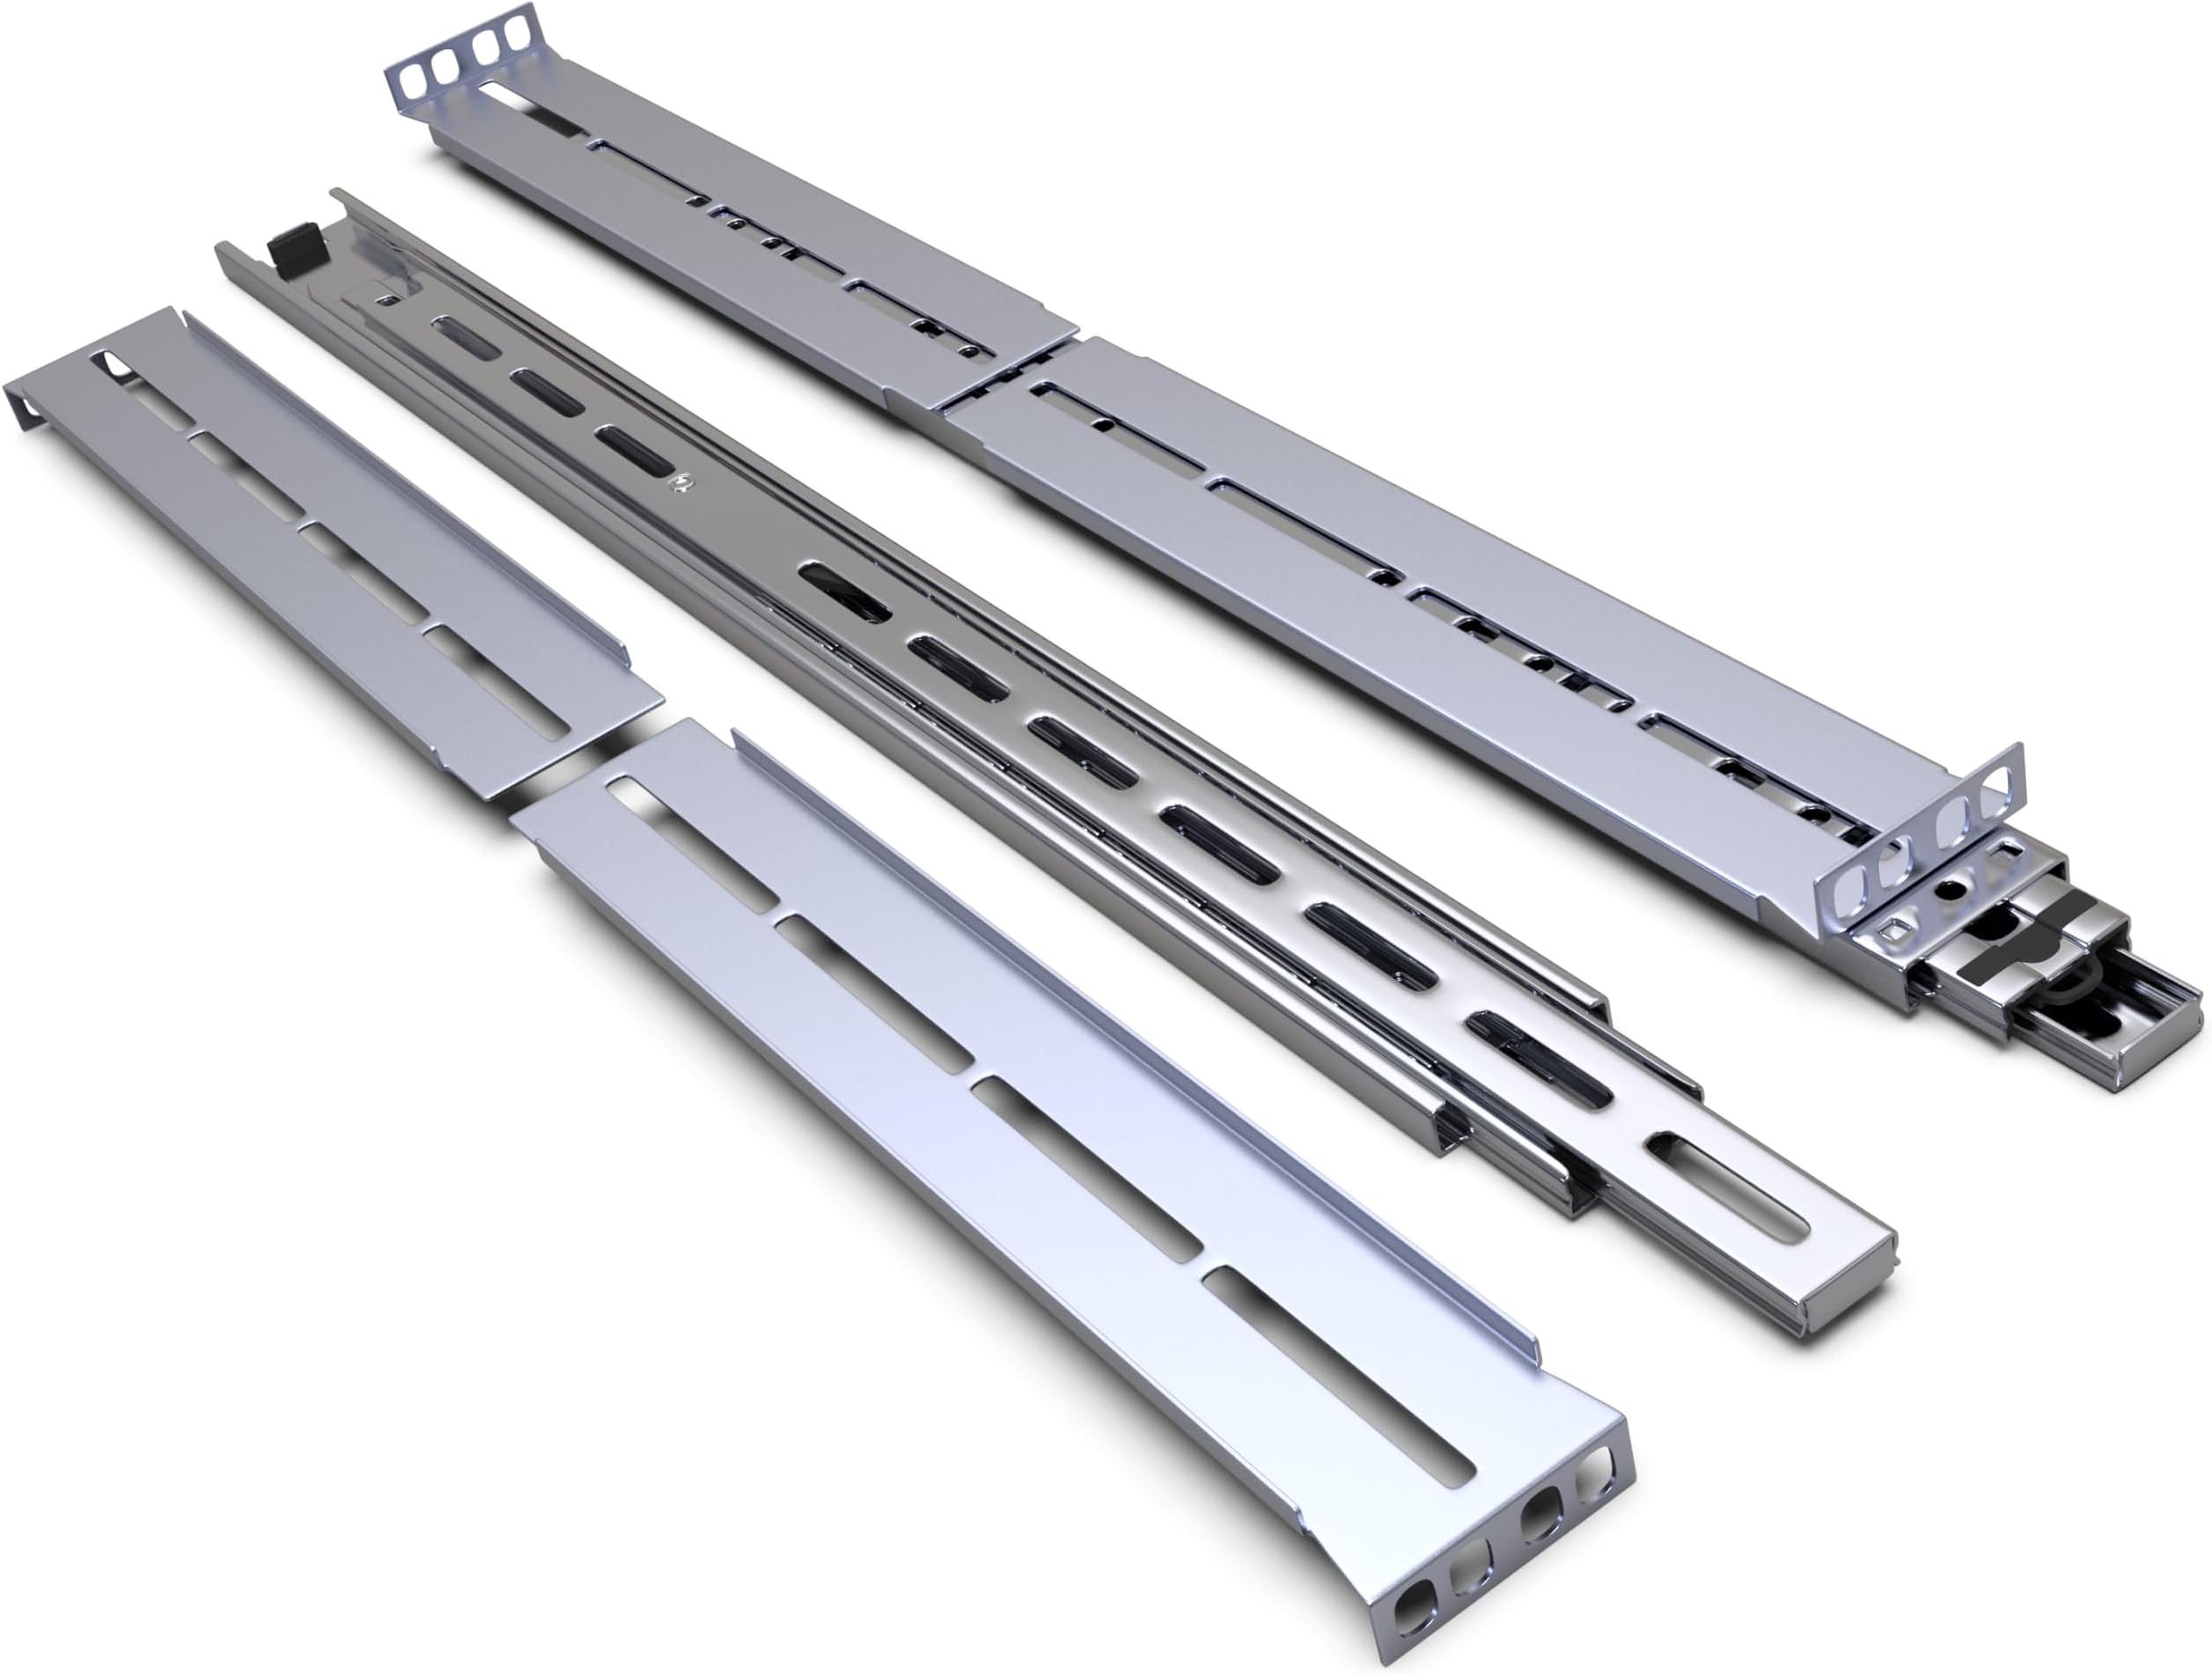
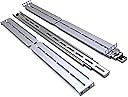
🚀 Slide into seamless server management with TP1822!
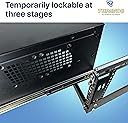
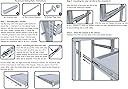
The Tupavco TP1822 is a versatile, heavy-duty rack mounting slide designed for professional server environments. It features an adjustable mounting depth from 26" to 40", a total slide extension of 52", and supports devices up to 130 lbs across 2U to 8U form factors. With tool-free installation, ball bearing rails lockable at three positions, and a quick-release handle, it offers both convenience and durability for efficient rack management.


| ASIN | B0B8QW9K1Y |
| Are Batteries Included | No |
| Best Sellers Rank | 195,645 in Computers & Accessories ( See Top 100 in Computers & Accessories ) 898 in Computer & Server Racks |
| Brand | Tupavco |
| Colour | Silver |
| Customer Reviews | 3.4 3.4 out of 5 stars (23) |
| Date First Available | 12 Aug. 2022 |
| Form Factor | 2U, 3U, 4U, 5U, 6U, 7U, 8U |
| Guaranteed software updates until | unknown |
| Item Weight | 2.49 kg |
| Item model number | TP1822 |
| Manufacturer | Tupavco |
| Product Dimensions | 66.04 x 5 x 1.3 cm; 2.49 kg |
| Series | TP1822 |
E**E
I have a few old rack chassis and I was unable to get ahold of the OEM rail kits for them so I found these here on Amazon. Not only do they fit, but the mounting hardware is better than the kits made for the chassis that I already had and at a lowest cost. I'd definitely recommend these rails as a simple, inexpensive, highly compatible kit. Thanks!
G**8
cheap material at a cost. Definitely going to buy startech or rosewill next time.
H**L
For your info, my rack is the StarTech 19" 42U open frame rack model extended to a depth of 29" from the front face to the back face of the vertical rails. A lot of people are complaining that the rail installation is fiddly. And yes, that is true, but there is a reason. The four extension sleeves that actually mount to your rack are supposed to sit behind the face of the rack. They do not hook around the face. And the square washers with flat heat screws that go into them, sit virtually flush with the rack frame face itself. Why you ask? So that when you push your chassis all the way back into the rack it will sit flush against the face of the rack. This way you can still put cage nuts in top and bottom to secure it like a regular piece of equipment if you wish. So many people are complaining about how these rails don't work, its because they don't understand the concept and are not installing them properly. People are also complaining about bolts being too long and interfering with the motion of the rail slides, that's because they are installing them backwards. If I had used all the provided hardware, I would have still had no problem. See the next section on why I didn't use all the provided hardware. For my Rosewill RSV-L4500U chassis itself they supplied plenty of hardware. I had six screws per rail insert that attached to either side of the chassis. That is more than enough to sustain most any chassis weight with a ton of gear inside including water cooling. However, there was not enough provided hardware in my package to attach the main part of the rails to the four sleeves that attach directly to the rack. So I went to the store and bout some longer 8-32 bolts with nuts and mounted them so that the end you screw the nut onto was facing out, away from the center of the rack. The rails worked fine with no issues (as long as the head of the bolt is not too big, the inner rails will slide right over them). I only have a small amount of sag to when my chassis is fully extended. Not much I can really do about it. And this is definitely not unique to this set of rails, especially when they are 26" long with two AIO's in it along with all the rest of the gear. I recommend installing everything only slightly snug at first. Then, with a bit of force you can shimmy anything into place if need be before tightening it all down. Even though I like these rails, I do still feel that they are a tad bit expensive for what they are. And for the price, they definitely could give you a better hardware assortment for the sleeves/middle part. Hence, only four out of five stars. But that's server gear for you, expensive even for low end server chassis' like my Rosewill RSV-L4500U chassis.
S**.
These are the worse rails I have ever attempted to use in a server rack. So many things done outside the accepted standard practices. And using nuts everywhere, when it hard to reach behind things to even hold the cut somtimes - crazy. The design is absolutely horrible.Instead of having some rails that could slid and lock down at the right length, the rail is in multiple pieces. And it's inteded for you to install the front and back pieces before the middle. another problem here, you can't use standard cage nuts on these. The way they are made you have to use there included flat top screw When you tighten them down you have to struggle to get a nut behind the rail in rack so that you can thread a nut onto the end. Same thing with the side raids. They are held on with a nut on the backside that is nearly impossilbe to get do., To top it off, there was hardware missing for this step. Only had half the screws and nuts necessary to put two in each attachment point. So looks like I'm going to have to risk running it with only 1 screw on each end holding the rail ... Pita to setup and if you do manage to get it done, questionable long term strength wth so many screws missing.
D**D
The rails work, they are an absolute nightmare to install. The directions are useless and filled with spilling mistakes. And the clearances are nano meters close.
Trustpilot
2 days ago
1 week ago