Buy anything from 5,000+ international stores. One checkout price. No surprise fees. Join 2M+ shoppers on Desertcart.
Desertcart purchases this item on your behalf and handles shipping, customs, and support to Poland.
🚀 Elevate your Raspberry Pi 5 into a powerhouse mini PC with style and smarts!
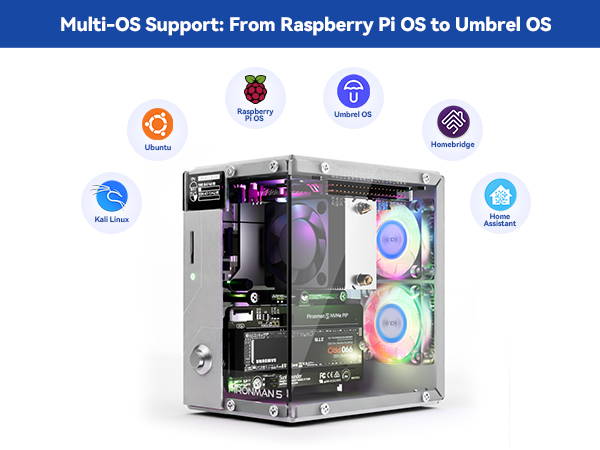
The Pironman 5 is a premium aluminum mini PC case designed exclusively for Raspberry Pi 5, featuring an expandable NVMe M.2 SSD slot (2230-2280), advanced cooling with a tower cooler and dual RGB fans, and a 0.96'' OLED display for real-time system monitoring. It offers enhanced connectivity with dual HDMI ports, a safe shutdown button, and supports the Hailo-8L AI accelerator, making it ideal for NAS, media centers, gaming, and AI projects. Its thoughtful design ensures easy assembly, superior heat management, and clean cable organization, delivering a professional-grade upgrade for Raspberry Pi enthusiasts.


| ASIN | B0D5CTRSQK |
| Antenna Location | Gaming |
| Best Sellers Rank | #134 in Computer Cases |
| Brand | SunFounder |
| Built-In Media | Pironmnan 5 for Raspberry Pi 5 |
| Case Type | Raspberry Pi |
| Color | Silver |
| Compatible Devices | Raspberry Pi 5 |
| Cooling Method | Fans |
| Customer Reviews | 4.5 out of 5 stars 927 Reviews |
| Enclosure Material | Aluminum |
| Fan Size | 120 Millimeters |
| Hard Disk Form Factor | 3.5 Inches |
| Item Dimensions D x W x H | 6.1"D x 5.3"W x 3.7"H |
| Item Weight | 0.38 Kilograms |
| Light Color | RGB |
| Manufacturer | SunFounder |
| Material | Aluminum |
| Mfr Part Number | DE-A-Pironman 5 |
| Model Name | Pironman 5 |
| Model Number | DE-A-Pironman 5 |
| Motherboard Compatability | Mini ITX |
| Number of Fans | 2 |
| Other Special Features of the Product | Tower Cooler, Dual RGB Fans |
| Power Supply Mounting Type | Rear Mount |
| Recommended Uses For Product | Gaming |
| Supported Motherboard | Mini ITX |
| Total Expansion Slots Quantity | 1 |
| Total USB 2.0 Ports | 1 |
| Total Usb Ports | 1 |
| Warranty Description | 1 Year Guarantee |
M**B
An excellent case with features unmatched by any others on the market
I am absolutely thrilled with this case. The assembly instructions are quite clear. After reviewing the instructions online, I was a bit intimidated because of advanced Parkinson's and my tremors. But then I watched the Wagner Tech Talk video on the Amazon product page along with the product images, and thought I could still handle it. I did need use a magnetic screwdriver, and I have to still use two hands to insert a screw. But, the clean and well-engineered design and build always allowed room to do so. Also, I needed a vice to hold the acrylic plates and had to use a razor knife steady with both hands to get a little piece of the paper peeled away, but then it came off easily. I did use a #2 Phillips for the screws for the fans. The case comes with spare parts, including the various stand-offs, screws, 2-pin wire connector , FPC cables, rivets, SSD studs, shorting pins, etc. The cooling tower is very impressive for ARM Cortex A-76. I did change a setting for the fans from being their default of always on to performance. This keeps the fans off until the temperature reaches 50° C. After doing so, I had to run a stress test to check it out as otherwise the temperature sits around 43° C to 47° C. The acrylic panel to be laser cut and etched. The detail was noted when peeling away the paper covering. Another attention to detail was with the thermal pads, which were cut to the precise size for their placement. They were also a good quality and don't fall apart as some thermal pads tend to do. The manufacturing of this case is really impressive. All the holes aligned, with just one very slight pull to get one screw in step 24. I inserted the screw in the lower left of the instructions first, and then the one in the upper right. I had to adjusted it maybe 1/64 of an inch to make it perfectly aligned. That, though, is on me as I didn't have the two piece perfectly aligned when I slid them together. This case is machined perfectly. With the small pieces, and like with any other project such as hundreds of other computer builds and upgrades, I use a large micro-fiber cloth on which I performed this build. In addition to a safe surface, it keeps the small pieces, such as the little M2-5 x4 screws, from rolling away if drop them. In addition to protecting the pieces, it saved time looking for dropped screws. The instructions, as mentioned before, are quite clear. The detail of the instructions matches the detail of the materials. For example, on Step 7, for connecting the 2-pin Wire between the USB HDMI Adapter and the battery connection on the Pi 5, it also includes zoom-ins of each so it is virtually chimpanzee proof to make a misconnection. The same is true in all other steps where there are wire or cable connections. When installing the Power Switch Converter in Step 14, it even indicates to be certain the pogo rods are properly aligned on the J2 jumper on the Pi (between the battery connector and the edge of the board). The only place where the detail is not precise is on Step 21 for connecting the cables for the fans. On that image, is shows the OLED screen already attached to the case, which does not actually happen until Step 25. But, that was most likely done to safe space to allow for the zoom-in on how the fan cables should be connected. The only thing I might add to the assembly instructions is in Step 17, when connecting the NVMe PIP to be certain to first align the pins from the 4-pin Header installed in Step 6 with the connector on the NVMe PIP and not forcing the PIP down to the standoffs. So far as the build, the only thing I might possibly change is to somehow have a tab to start the peeling off of the paper from the acrylic panels. The laser cut makes it virtually impossible to have a tab between the acrylic and the paper. But, maybe a pull-up tab such as on some ketchup and mustard bottles could help. Regarding some comments on the build… As one claimed, I have no doubt whatsoever that the one copper pipe one the cooling tower did indeed come "crunched up." However, if you look at the image on the product page, you will see it is crimped. It also shows as crimped on the instruction page. Had the reviewer referred to the SunFounder website, it explains, with an image emphazing the crimp, "The U-shaped heat pipes at the top of the tower cooler are compressed to facilitate the copper pipes passing through the aluminum fins, which is part of the normal production process for copper pipes." Some mentioned fan noise. The fans are actually extremely quiet, rated 22 dB, which is barely audible. Mine tested at 20 dB. The volume doubles every 10 dB. So a whisper at 30 dB is twice as loud as the fans; a babbling brook at 40 dB is 4 times as loud as the fans. From past experience, the most likely cause of fan noise on a new build is not checking that the wiring was properly aligned, and a wire is interfering with the blades. Later, it may become things like dust build up, worn bearing, etc. But, on new builds, it is almost always a wire or something else interfering with the blades. Related, one mentioned being confused on the airflow, not finding an air intake, and thought the fans could perhaps be intended to suck air in rather than blow air out. However, the SunFounder website also covers this. The "cold aisle" air intake is through the GPIO, which is strategically placed just above the fins on the cooling tower (another nice engineering feature), and the two fans in back blow the air out into the "hot aisle". Regarding the Micro SD connector, one seeming claimed the whole world is having the same issue, and then provided a screenshot revealing misconfigured firmware dependency/ordering issue on the Pi itself. Some mentioned the NVMe PIP module as an issue. However, none seem bothered to look at a solution on the SunFounder website, or provided any analysis. There is most likely a solution provided on the SunFounder website: • If the PWR LED is on but the STA LED is not blinking, it indicates the NVMe SSD is not recognized by the Raspberry Pi. • If the PWR LED is off, short the “Force Enable” pins (J4) on the module. • If the PWR LED lights up, it could indicate a loose FPC cable or unsupported system configuration for NVMe. If it is the second issue, shorting pins are provided with the case. Wrapping up… The very small minority had any issues, and by the way the are "diagnosed" and written, had any of those who had any issues had gone to the SunFounder website, on on its product page, read through the FAQs (last menu item on the vertical menu on the left of the page), their issues would have been resolved. If you can follow instructions, this is a quite easy build. The number of steps name seem large at 27, but they are all baby-step, each taking from just a few seconds to maybe a minute to perform. For me the most difficult step was peeling the paper off the acrylic panels, which too is covered in the FAQs, and gave me the idea of using the razor knife. To put it in more simple terms, had this been an $80 meal, the waiter would have gotten an $80 tip.
S**N
Expensive, but worth it if you're also installing an NVMe SSD.
I love the Raspberry Pi (RPi) family of tiny computers. I've been using them for over a decade. The RPi 5 is, hands down, the best release in the lineup yet. As an IT professional, I find that the RPi 5 could actually replace many people's old Windows 10 PCs and they'd be happy with it. I've been wanting to do a specialized build around the RPi 5 for a while, just to really see just how far I can push it. I recently had a small windfall, so I decided to pull the trigger and just go hog-wild. I got a 16GB RPi 5 (the most RAM you can get on it), a 1TB Samsung NVMe SSD, a good power supply, and this Pironman 5 case. At nearly $80, it's a far more expensive case than anything I've ever bought for an RPi before (over 4x more), but it's just so dang cool that I had to get it this time! What I Like: This is a full kit. It comes with an NVMe SSD adaptor that is specifically designed for use with this case, so that offsets some of the cost. These adaptors run between $10 - $20, and mounting one with other cases is... interesting. Because the adaptor is designed for use with this case, it all fits together inside neatly. This kit also has a power button that's much easier to use than the one built onto the RPi. This may sound like a little thing, but all the little things about this case add up to make it really nice. This case is the total package if you want something that will really look good on your desk. Yes, the lighting is cool, but this case also moves the power and HDMI ports around next to the USB and ethernet ports as well, so all your cables come out the back of the system. This makes cable management SO much easier and cleaner-looking. The lighting is programmable. You simply go to the website listed on the included assembly instructions and follow the instructions to download and install the software that controls it. The lighting has various modes it can run in, and can be controlled from the CLI or a simple web interface. The web interface is on port 34001, so it won't interfere with other web services if that's what you're running on your RPi 5. Heat management is a bit more of an issue on the RPi 5 than it has been on earlier RPi boards, but this case laughs in the face of that. I've been running my build pretty hard, and it hasn't even hit 50 degrees C. The heatsink and fan that comes with the case is incredibly efficient, and the 2 rear fans move plenty of air as well. It's whisper-quiet, too. The reviewer that complained about them being loud must have got a bad fan (it happens), mounted the fans backwards, or routed wires wrong so they hit fan blades. The little screen that comes with the case is really nice, too. Yes, it's small, but it kind of has to be for the look the case is going for. The resolution of it is good, and even with my not-so-great eyesight, it's quite legible. The information it displays can be changed according to what I read on the website, but I like its default of showing the CPU utilization and temp, the IP address of the system, RAM utilization, and free drive space. There are plugins for the taskbar that will give some of this same information, but why not leave the space there for other things instead? The assembly instructions are really clear and easy to understand. They show 24 steps, and the case really is that complex. Following the steps is simple, so even though this is a complex case, it isn't difficult to assemble. Just be careful to follow EVERY step. I accidentally skipped a step and had to backtrack to fix my mistake when I realized I'd made it. If you don't like like following lots of directions to assemble a project, this might not be the case for you. What I Like A Little Less: Like I just said in my last point, there are A LOT of steps to putting a system together in this case. You need to have your RPi 5 in-hand to put this thing together. It absolutely can not be the last thing you put in. This was a little disappointing for me because my RPi 5 came 2 days after the case, and I wanted to start assembling so all I had to do was pop the RPi 5 in when it got to me. Definitely not a problem, but be aware of it. The GPIO port in the case side is labeled with the pinout. This is a fantastic feature, but the labeling is laser-etched, and tiny bits of the protective paper get left behind in the etching when pulling it off. I had to gently scrape them off with my fingernail after removing the majority of the paper. I know, I'm being really picky with this. The side with the GPIO port is a little bit tricky to line up with the screw holes. Another reviewer mentioned this, but said he though it was his fault for not lining something else up just right. It turns out that he was being nice by saying that. There are little tabs on the GPIO extender that fit into holes in the clear side of the case for support. Because The clear cover that gets installed on the GPIO extender card pushes into the heatsink ever so slightly, this makes the side screw holes sit slightly out of alignment. It's easy to push things into place to line them up, but it will be an issue if you don't realize what's going on. What I Don't Like: The kit is missing some heat-transfer pads in my opinion. Most heatsinks for the RPi 5 have pads for the CPU, RAM, USB, and networking chips. Occasionally, they also have one for the other chip up in the corner by GPIO pin1. This kit comes with pads to put on the CPU, the chip by GPIO pin 1, and the power regulation circuit. Fortunately, I had pads for the other stuff from another source. I'm not sure this would really affect thermal performance because of where the back fans are, but I wanted to mention it. The software for this basically disables the power / storage activity LED on the RPi. This isn't a big problem while the system is in use since all the other LEDs are on and doing whatever you've configured them to do. However, when shutting down, all the lights go off before the RPi is done shutting down, a long time before. Before I found a fix for this, I only knew it was still working on shutting down by the text in the lower-left corner of the monitor. The software also slows down shutdown of the RPi. Because the power LED never turned red (it was disabled), i didn't realize the system was still shutting down as I tried to turn it back on because I had forgotten to configure something. Frankly, I didn't know if the power button was working to turn the RPi on again or not. This was particularly annoying before I found out that there was a firmware update available for my brand-new RPi 5. I downloaded and installed it with the command "sudo rpi-update" (without the quotation marks). After I ran that, the built-on power / storage activity LED got re-enabled when the case's software isn't running. It's a little weird, but at least I now know when the system is powered off and safe to unplug. I strongly recommend installing the software for the case, THEN running "sudo rpi-update" afterward to re-enable the on-board power LED when the other software isn't running. None of what I don't like was irritating enough for me to take any stars away, but I felt it needed mentioning. The bottom line is that this is a fantastic case for a nice RPi 5 system, even for the price, and I'm glad I got it.
T**S
A must-have Raspberry Pi 5 case that feels worth every penny
I’ve had this case for over a year now, and I can honestly say it has been worth the money. It has done a great job keeping my Raspberry Pi 5 safe, and it has held up really well over time. When you use your Pi for a lot of different projects, having a case that feels solid, dependable, and well-designed makes a huge difference. What I like most about this case is that it feels like more than just a shell around the board. It turns the Raspberry Pi 5 into something that feels much more complete and premium. The aluminum construction, NVMe support, cooling setup, OLED screen, and safe shutdown features all help it feel like a serious upgrade instead of just basic protection. SunFounder also positions it as a mini PC style case for Raspberry Pi 5 projects like NAS, media, gaming, Home Assistant, and AI work, and that matches the kind of versatility it gives you. The AI HAT slot is another big reason this case stands out to me. That extra flexibility really comes in handy, especially if you are doing more advanced projects and want room to grow. The product is specifically described as supporting the Hailo-8L AI accelerator along with NVMe M.2 SSD sizes from 2230 through 2280, which gives it a lot more usefulness than a basic Pi case. I also appreciate that this is the kind of product that still feels like a good buy after the excitement of opening it is long gone. A year later, I’m still happy I bought it. That says more to me than a first impression ever could. It has protected my Raspberry Pi 5, it has stayed useful, and it still feels like one of those accessories you do not regret buying. Overall, if you have a Raspberry Pi 5, I really think you should own one of these cases. It is well worth the money, it adds real functionality, and it gives your Pi a safer, more polished, more capable home. You will not regret it.
T**.
Excellent Rasperry Pi 5 Case with NVME Drive Support
I received a Pironman 5 on Oct. 8, 2024, and completed the assembly in about an hour. It is operating properly, and I am very impressed with the case. I am not new to the Sunfounder product line, as I also own a RasPad, which I use regularly. During the assembly, software installation, and making changes to configurations, I noticed some trouble points and issues in the instructions. In the interest of only helping make a very good product even better, I have suggestions for the assembly instructions, and other possible improvements. I am a retired engineer by trade, and am always critical of designs, to facilitate more efficient designs, and better products. First is air flow. The instructions do not clearly indicate the orientation of the RGB fans. Since you placed filters between the fans and “Plate B”, the unclear instructions indicate that air would be flowing into the case, rather than out, as outgoing air would not require a filter. So, I installed the fans for incoming air. I also noticed that the tower cooler fan would be blowing air towards the incoming air from the RGB fans, so I reversed it, to use the already accelerated air from the RGB fans, and draw air through the heat sink, and move it towards the front of the case. The only issue I had here was that since the rotating part of the RGB fans rubbed on the filter, and did not rotate properly. To resolve this, I replaced the M3.5x10 fan screws with M3x12 machine screws and nuts, with flat washers between the filters and fans. This works quite well, but one of the nuts is pressed against the NVME PIP board, but not adversely. Second, I noticed a difference in the number of thermal pads. The official Raspberry pi heat sink has a pad for the voltage regulator, but the kit does not supply one. The tower cooler has space for a pad, so I installed one. I expect that there was a reason for the inclusion of the pad in the official heat sink. Third, is the soft rubber foam that is meant for the case to sit on. With stiff HDMI cables, these “feet” do not support the case in any way, causing the case to sit in a not so vertical position. Because of this, I removed the foam pads, and replaced them with four low profile 3M stick-on feet. This has completely corrected the instability of the case. Forth, is the screw attachment. Many if not most of the people who will be assembling this kit are not familiar with proper assembly methods. In particular, the inexperienced builder will put a screw in, and tighten it before adding the next screw. As with all assembly, all screws in a single part should only be started, not even close to tightening, so minor adjustments can be made so ALL screws line up, and can be started. Only then should the screws be tightened. In the case of attaching “Plate A” to “Plate B”, there are two screws that are not in the same plane as the other four. These two screws should only be tightened AFTER the four screws are tight, so the holes on the “two screw side” are aligned before tightening. My thought is to keep a positive pressure inside the case, as I believe that having air flow directed at the tower heat sink is a plus. Since the filters block the majority of air flow, I have removed them, and tested temperatures. This resulted in a 9 to 10 degree reduction in CPU temperature, without the tower fan operating. My primary computer (operates 24/7) has a 3-bay liquid cooling radiator for the motherboard components, I only have to clean the dust out every 6 months. I expect that this will be the timing to clean the Pironman 5 case as well, so the filters are more of an airflow reduction than a real advantage. My personal preferences regarding case lighting is that I don’t really go for it. It’s just a bit too flashy for me. So, I have replaced the LED fans with a pair of dual ball bearing fans that run a bit louder, but not much. I have set the addressable LED’s (commonly called NeoPixels) on the IO Expander board to a solid bright blue with a bit more green and less red creating a slightly turquoise color to illuminate the inside of the case, which is very pleasing to me. In conclusion, I feel that this is an excellent case for the Pi 5. The aluminum parts are good quality aluminum, and were properly annealed before bending, so all bends are very clean. The OLED display is bright, and shows pertinent information, including multiple IP addresses (in my case the VPN IP as well as the LAN IP). The NVMe interface works well, and there were no issues installing the Raspberry Pi OS, and booting to it on the first attempt.
D**S
Stylish, Functional Raspberry Pi 5 Case—Great Cooling & NVMe Support
What can I say about the Pironman 5 case by SunFounder: I absolutely love this case. It is definitely pricier than other alternatives, but I find the aesthetics and features more than make up for it. Once assembled, this resembles a mini gaming pc, giving it a unique look for the desktop. I enjoyed putting this together, and everything is nicely labeled and separated which makes building much easier. Just make sure to pay attention, as one of the first steps can easily be done incorrectly. This case also provides a few extra features. It converts the micro HDMI ports to full-sized HDMI, as well as gives a NVMe slot. Just make sure to read the documentation provided by SunFounder on which NMVe to purchase, as not everyone will work. I found that the TeamGroup MP33 works flawlessly. With the connected boards, it lines up all of the ports onto one side, making cable management much nicer. It also sports a small OLED display on the front (once the pironman software is installed and configured) that displays the device's IP address, the CPU usage and temperature, and RAM and storage usage. Once everything is built, installed, and configured properly, a dashboard can be accessed where you can control how the fans function as well as monitor system stats. Just a word of warning: If you don't install the pironman software, then the RGB fans will remain on and active, even after you shutdown the PC. Pros: + Transforms the Raspberry Pi 5 into a mini-tower PC with active cooling, NVMe SSD, and RGB + Great thermals and quiet operation thanks to PWM-controlled fans + Handy OLED screen displays real-time system info + Browser-based control panel makes customization easy Cons: - Assembly can be fiddly - the aluminum case was slightly bent, causing the final build to be a bit tougher to finish. Your milage may vary - Removing the Pi later is difficult. This case isn't meant for swapping the board in and out, so if you need constant access to the Pi itself, you may want to skip this case - Cost - At $80, it's about the same price as an 8GB Pi 5, doubling the total cost (not including an NVMe) - NVMe compatibility - not every NVMe is compatible, and once installed, it will run at Gen 2 speeds. There is a tutorial on YouTube on how to configure your Pi to run at Gen 3 speeds if you're interested Overall, I highly recommend this case for anyone who loves to assemble things like LEGOs and is absolutely obsessed with the Raspberry Pi environment. This is perfect for those who wants to use a Raspberry Pi as a PC and wants a visually appealing device on their desk.
C**G
Amazing build quality, but got a few bad components
I have such high hope for this case, it has everything I wanted 1) Full HDMI header 2) NVME Extender 3) Tower cooler 4) Amazing look and high build quality It checked every boxes I had, unfortunately I still have to return it, and here is why. I clicked on the step by step video on assembly, complete every step exactly the way it was describe. After full assembly, press the power button. Fan came on, but waiting 20 seconds later, still no HDMI signal. Check router and no connection via wifi work wired. Press and hold power button and restarted. Same problem. I don't need nvme to boot to Batocera, just the flash drive should work. So disconnected that and restart. Same issue. I don't need to LED display and raiser card, disconnect and restart. Same issue. I don't need the HDMI extender card, disconnect and restart. This time HDMI got signal, but no boot screen, nothing is showing. Finally I don't need the SD card extender, disconnect and restart. 20 seconds later, I am back up and running with Batocera. But at this point, all I have left was the tower cooler connected, everything else is off. So from taking piece by piece out, At the very least, the HDMI extender card doesn't work but does supply power. The SD card extender also doesn't work. When I say doesn't work, I mean the parts I have, I am sure other may have good working parts. This case has amazing build quality, but unfortunately what I got did not work, and I don't feel like spending another 3 hrs on it by choosing to replace instead of just return.
T**Y
Coolest raspberry pi case ever!
I bought this case and am very impressed with the quality and the spot on instructions to assemble it it looks like a high end gaming rig, the led lights are awesome, runs really cool with two case fans and a cooling tower (included) I also added a 1 tb stick to the adapter and hands down the coolest case ever I’d reccomend it to everyone just for the cool factor but it has so much more there is even a led screen that tells you all the stats of youre machine at a glance, may seem pricey to some but it is well worth the cost
W**N
Overly large w/many auxiliary PC boards, lots colorful fans, clear case
Looks like a pile of poorly thought-through boards and transition/adapter boards, in a significantly oversized case for a Raspberry Pi. If what you want is dynamically changing RGB colors in a see through case and lots of cooling -- 3 fans, one on a heat-pipe sink (thermal performance untested by me). It was highly recommended by Patrick, the Raspberry Pi guru. It has a nice power button. The display on mine was only usable momentarily before returning to a useless quiescent state each time. Their support seemed willing, but I was not able to satisfy them with an appropriate video format from my phone. I didn't really care about the display, and gave up on the entire case before we resolved the display issue. I much prefer cases like the Argon NEO 5 M.2 NVME PCIe case -- compact, neat, and professional-looking with a nicely integrated NVME PCIe with heatsink in it's separately accessible molded compartment on the bottom. As a follow-up to the above review: The Sunfounder support staff followed up with quite a bit of additional effort and offers. I'll give them an "A" for effort. In addition, I have a few other Sunfounder products with which I'm very happy. It's just that this particular case had very little FOR ME or for others with similar goals and interests.
J**N
Un gran producto!
El producto está en perfectas condiciones, el montaje es muy preciso y requiere habilidades técnicas, es importante saber que no está incluida la raspberry ni la ssd, por lo que es importante obtenerlas antes de el montaje. Una vez instalado se tiene que instalar el SO a la targeta micro SD y luego a la SSD. El software y los scripts de Piron man 5 son muy chulos te permiten controlar los ventiladores, leds y incluso la pantalla oled. Recomiendo este producto a todos los aficionados de Raspberry!
S**E
⭐⭐⭐⭐⭐ Das ultimative Gehäuse für den Raspberry Pi 5 – echtes Gaming-Design und perfekte Ausstattung!
Ich habe lange nach einem Gehäuse gesucht, das meinen Ansprüchen an Design, Kühlung und Funktionalität für meinen Raspberry Pi 5 gerecht wird – mit dem Pironman 5 bin ich endlich fündig geworden! Top Features für mich: Absolut geiles Design: Das Gehäuse sieht aus wie ein Mini-Gaming-PC und ist auf jedem Schreibtisch ein Hingucker! Die Verarbeitung ist hochwertig, und die Optik ist wirklich außergewöhnlich für ein Pi-Gehäuse. All-in-One Lösung: Hier ist wirklich alles dabei, was man braucht – aktive Kühlung, Platz für eine NVMe-SSD, Netzschalter, Lüftersteuerung und sogar LEDs. Das Setup ist unkompliziert, alles passt perfekt zusammen und macht einen sehr wertigen Eindruck. NVMe ready: Ich habe eine 256GB NVMe-SSD verbaut, und es war wirklich einfach. Wer ein schnelles und stabiles System will, kommt um NVMe eigentlich nicht herum. Super Kühlung: Die Temperatursteuerung funktioniert hervorragend. Meine CPU-Temperatur liegt im Home Assistant-Betrieb mit AdGuard bei ca. 40 °C – und das sogar ohne, dass die Lüfter anspringen müssen! Erst wenn’s wirklich heiß wird, schalten sich die Lüfter temperaturgesteuert (über die Pironman 5 Software) zu. Für mich optimal gelöst. NVMe-Kühler: Ich habe zusätzlich einen NVMe-Kühler installiert, um die Lebensdauer der SSD zu verlängern. Auch hierfür ist im Gehäuse genug Platz vorhanden. Bausatz und Montage: Das Gehäuse wird als Bausatz geliefert und war in ca. 30 Minuten komplett aufgebaut. Die Anleitung ist verständlich, alle Teile sind sauber verarbeitet und passen perfekt – auch als Anfänger bekommt man das locker hin. Praxiseinsatz: Home Assistant läuft absolut stabil und schnell auf dem System, inklusive AdGuard. Keine Überhitzung, keine Probleme, und dazu noch ein echt schickes Gehäuse. Fazit: Das Pironman 5 ist für mich das perfekte Gehäuse für den Raspberry Pi 5 – kompromisslos bei Design, Ausstattung und Funktion. Eine klare Kaufempfehlung für alle, die mehr als nur eine „Plastikbox“ wollen und Wert auf Performance sowie Optik legen!
K**R
Awesome product, must for Raspberry Pi 5 users.
Awesome product. Perfect for RPi 5. Same as described. Very very good quality & performance (100/100). Initially display will not work. Don’t worry, Install Pironman 5 software from GitHub. It will ask for restart. And after restart, Wow… display will start working.
T**B
Qualité, esthétique, bon refroidissement
Le boîtier est parfait pour mon utilisation. Il est conforme à la description du produit. Il fonctionne très bien. Le schéma d'assemblage est complet, il ne faut pas avoir car il est livré en pièces détachées. Rien d'insurmontable, il faut compter 1h pour tout intégrer dans le boîtier (raspberry et SSD) Le ventilateur du CPU se déclenche lors de la montée en température mais le refroidissement est si efficace que seuls les ventilateurs du boitiers tournent. Les ports USB, HDMI sont déportés, plus besoin du câble micro HDMI, ici c'est des ports HDMI classique. Très satisfait, beau et petit. J'adore.
W**H
Super obudowa PironMan5
super. Obudowa jest doskonała, znakomicie wykonana. Sporo drobnych elementó jest w wiekszej ilości na wypadek zgubienia lub uszkodzenia. Idealna !
Trustpilot
3 weeks ago
2 weeks ago