


🔩 Crack the code on broken plugs — master your Ford 3V engine like a pro!
The Lisle 65700 Broken Plug Remover Kit is a specialized 3-step toolset designed for Ford 3V engines to safely and efficiently extract seized or broken spark plugs. Featuring a patented porcelain puller, porcelain pusher, and self-tapping puller, it tackles even the toughest plug failures with precision. Packaged in a durable blow molded case, this kit is a must-have for DIY mechanics and professionals aiming to avoid costly repairs and downtime.


| ASIN | B00SQ4FSN6 |
| Best Sellers Rank | #30,125 in Automotive ( See Top 100 in Automotive ) #71 in Spark Plug & Ignition Tools |
| Brand | Lisle |
| Brand Name | Lisle |
| Compatible with Vehicle Type | UTV |
| Core Material | Copper |
| Customer Reviews | 4.5 out of 5 stars 4,134 Reviews |
| Global Trade Identification Number | 00083045657002 |
| Included Components | Kit |
| Item Type Name | Plug Remover Kit |
| Item Weight | 1.89 Pounds |
| Manufacturer | Lisle |
| Manufacturer Part Number | 65700 |
| Manufacturer Warranty Description | Lifetime |
| Thread Size | 14mm |
| Top Material Type | Metal |
| UPC | 083045657002 |
| Unit Count | 1.0 Count |
| Vehicle Service Type | UTV |
J**K
A must have for any Triton owners
I don't usually review products on here, because I am to picky and generally consider my self a very tough, hard to please consumer. This product, however, deserves my time. 2006 F150 5.4 Triton, 98954 miles, original plugs. It started to miss, then rough idle, then slight difficulty starting with change outdoor temp (getting colder). Then the truck just wouldn't start. I figured it was the plugs, Was shocked to find the plugs cost like $10 each...I started to remove the plugs using a deep well 9/16 socket on 1/2 drive. Engine was cold, cracked the plugs loose, filled each spark plug hole with PB Blaster (wish I would have used carb cleaner instead, better on carbon). A couple hours later I went to work. I removed two on the left bank, with two being difficult, so I let em soak. I removed two from the other side as well, letting two more difficult ones soak. I actually did something really stupid, I said out loud, "I don't know what the big deal is, these plugs aren't any trouble". Yep, you guessed it, the next four failed. Three came out ceramic in tact, leaving the metal shield behind, while one came out with electrode in tact, leaving the bottom of the ceramic and shield behind. I now decided to order the plugs and the Lisle tool. It was absolutely cheapest here. It arrived and I read the instructions. The pictures were the most helpful. The three shields came out first try, no problem, The thing works exactly as advertised and is a nice little engineering wonder, well thought out, yet simple...the same kind of though process was used to design this tool as I would have liked to have seen by the Ford engineers when the designed the 3V heads...anyway... The fourth plug with the ceramic behind was a little tougher. I used the "pusher" to push the remaining ceramic to the "strap" at the bottom of the plug. I then tried unsuccessfully 4x to pull it out. The carbon was just two strong. and the remaining ceramic in the shield just didn't leave me enough real-estate to sink the threads into. I was forced to push the ceramic down until it broke the strap and gained enough real-estate for the threads to really grab. This was accomplished by using a piece of rod longer than the included Pusher that makes contact with the ceramic. Once that was done, it grabbed and pulled the ceramic and shield right out. Dont forget to use a dab of grease on the threads to aid in cutting into the shield and to catch the small metal pieces that are created. Also, this is not a "bull in china shop" type job, take your time, use finess not muscle. Good luck. Great tool, Great Price, Quick delivery. Thanks Amazon.
Y**6
Great Tool For Extracting Ford 3 Valve Engine Broken Plugs, Easy To Use and It WORKS!
Update: This first pragraph is a more to the point summary of the below review. I used the Lisle tool to replace 5 broken plugs out of 8 on a 2007 Ford F150 5.4L at 94K. It was quite literally a must to remove the broken plugs and worked flawlessly. The following paragraphs may be helpful if your having an issue with your broken plugs: Replaced the plugs on a well maintained 2007 F150 5.4L at 94K and followed Ford's TSB (Technical Service Bulletin) on plug removal to the letter (actually above and beyond by soaking the plugs in aerokroil penetrating oil 18+ hours after a 1/4 loosen turn) and 5 of the 8 plugs still broke. Prior to, I was really stressing over doing this job after reading all the horror stories from Ford owners of plugs breaking . So just in case I bought the Lisle tool and had it there ready to go. Boy I'm I glad I did! I'm a weekend mechanic, I don't do it for work, fun or a hobby....I do it when the truck/car needs fixed and it's within my technical and tool capabilities. This tool is well within mine and it will be for most people. If you change your own spark plugs you can use this tool. One note is make sure you have a 'Deep Socket 15/16 Socket', you HAVE to have this to use the tool for the extracting part.. A standard 15/16 socket won't do, it's got to be a deep well socket (Guess who had to degrease themselves enough to go to the store to get a socket!). The Lisle tool worked flawlessly but there's a few points you need to address if you use it. Having an air compressor with a long angled attachment to blow any penetrating oil or broken ceramic from cylinders is highly recommended. I used the Hiltex® 31111 24" Air Blow Gun with Angled Aluminum Nozzle | Standard 1/4-inch NPT Air Inlet that I bought on Amazon and it worked great. BE CAREFUL when you use the aerokroil oil. If you get too much down into the actual cylinder it can cause MAJOR problems with engine 'hydro lock'. So if you soak the plugs with the oil, be SURE that you get the excess oil out of the plug port before you try to extract the plug. I used a DIY contraption (it was a 3/4" diameter flex hose taped to the vac hose) on my shop vac to suck out the excess oil and then blew it out with the air hose for safe measure. Then, when the plugs were finally out, I repeated that process getting any exceess oil out of the cylinders before putting the new plugs in. Also, there's 2 different ways the plugs break and are described in Ford's TSB as 'Mode 1' and 'Mode 2'. Mode 1 is where the plug just snaps and you bring out the top half of the plug in your socket. That's "good", just go straight to the Lisle tool to extract it. But with me, mine broke off in Mode 2, where the whole plugs turns but is still stuck in the engine. Then in order to use the Lisle tool you have to get that top portion of the plug unattached from the rest of the plug. That was my pain, trying to get a pair of needle nose pliers, with angled heads or not, in some of those plug holes. It was impossible to disengage the top portion the plug in "Mode 1" with the pliers in 2 of the cylinders. So in those 2 cylinders I retightened and loosened the plugs several times, with a lot of wiggling it around between, until the top of the plug finally disengaged. In addition, I used the Sunex 884505 3/8-Inch Drive 9/16-Inch Extra Deep Spark Plug Socket, available on Amazon and recommend it. Thank goodness for the Lisle tool, it's a serious 5 star tool, but I'm not happy with Ford....at all. If this is just too much for you to tackle and you decide to take the chance with a mechanics shop, be sure to Google the Ford Spark Plug Settlement. It explains the class action settlement against Ford for this problem. It explains their reimbursement procedure for over expenses you incur for having the plugs changed out. There's forms you can download to complete the process. It was a slap in the face to me because it's percentage based but if your stuck and can't do this job yourself make sure you use it. One last note. If you have the money and your approaching 100K go ahead and replace the coil packs with a quality product. They sit on top of the plug and have to be removed anyway to take the plugs out so no extra time. On my previous Ford 5.4L they started going out 1 by 1 after 100K so this time I just took care of it at the same time. Good Luck!
B**N
Great tool to do the job but do your research!!!
First of all let me say this is a great tool to do the job of getting broken spark plugs out of a Ford Triton v8 engine. Specifically I used it in my 2005 Ford Expedition. I STRESS read reviews on here and watch YouTube videos before attempting as one flaw is the instructions that come with the tool tell you the basics but not everything. A recent reviewer in here with a five star rating posted detailed pictures with what to do for lubrication which the instructions don't even mention. I highly recommend you read his review. I won't say everything he already did but confirm a few things where potential issues are and how I handled them. First I did put nickel anti-seize compound wherever there were threads on the tool before using except for the self tapping screw thead. On the self tapping screw thread I used high temp grease but any grease would do. The reason for using these products is it helps keep the tool from slipping or getting stuck and also seemed to help prolong the life of the threads or tapping screw. I read many reviews and those not doing this seemed to have the most problems with threads getting stripped after a couple of uses. I got 7 plugs that broke off and could have done many more I think. Even doing all these steps however I saw that the self tapping screw after 7 was just starting to flatten on one of the threads but still working fine. I also noticed that the thread on the pusher tool that screws into the spark plug hole was slightly stripped even after lubrication and I am not sure why as that should not have happened. It was still overall working however and usable. I probably could have pursued a warranty claim with the company on that one but it got my 7 plugs out so I did not take that route. Finally something I did not see reviewed on here is after extracting the plugs how do you get them off!!!!! They do not just twist off like the instructions say at least not for me. I tried clamping them in a vice and twisting off but since they are circular that still did not work. The only way I could get them off the self tapping screw was to break off the porcelain as low as it could go, put a screw in there and hammer it down lightly to push the porcelain down into the plug per the pictures, and then use a 1/8" metal drill bit to drill through the end of the plug per the picture while it was in my vice grip. Why do this? Well that allowed me to put al Allen/hex key through the two holes and I was then able to clamp the plug into the vice with the Allen/hex key in the clamp so it would not spin no matter the torque. My pictures don't show the self tapping screw in the plug but it would have still been in there and you could then use your ratchet to put a lot of torque rotating clockwise to get the plug off the screw. It worked great once I figured out how to do it. I hope this helps save someone else the frustration I had. I did this with all 7 of them. It takes a little time but not bad once you get the hang of it. Regarding the rest of the tool I fully pushed the pusher into the plugs and had no issues with that. Some people say not to as they are afraid it will break porcelain or something else into the head but did not happen to me. Either way if you have a shop vac with tubing improvised to suck stuff out of the plug holes and an air spraying tool to stick into the head and blow it out there should not be issues. Another recommendation: TAKE YOUR TIME! It helps. I spend around 8 hours on this total. Fixed my misfire I was getting going up hills in the 45-55 range. Finally, if you break a tab on the coil connectors that holds them onto the plug coil use a zip tie to hold it on as much cheaper and simpler than messing with the wiring harness. One on my tabs broke and this is what I did to fix it. Finally make sure all your coils are attached when done as if you get a misfire after doing this, most likely that is the cause unless you sprayed too much cleaner in there and did not blow it out with a tool. Overall the tool did the job and I don't see anything out there that will do better. Improvements could be made on the directions and possibly the threads to strengthen them but not sure. The self tapping screw part supposedly has an updated better one the company put out with 4 straight markings on the tapping steel assembly. Mine did have these 4 markings upon inspection. Hope this review helps you and the reason I put the time into this review is the effort I had to put into researching it. I just wish I had a video to attach as well but I don't. Enjoy.
B**F
Works as designed but it's not idiot proof
I'm glad I went with the name brand version of this. All 8 of mine broke off so this paid off after the first one for sure. The additional tool that helps extract the ceramic is well worth it as well. Don't rush this job you will get humbled quickly Good luck with this job it'll test you as a human and your depth of ratchets/extensions and wobblers....
M**D
Awesome Product! It works. Removed 2 plugs, big savings. Best price on internet, fast shipping. A+`
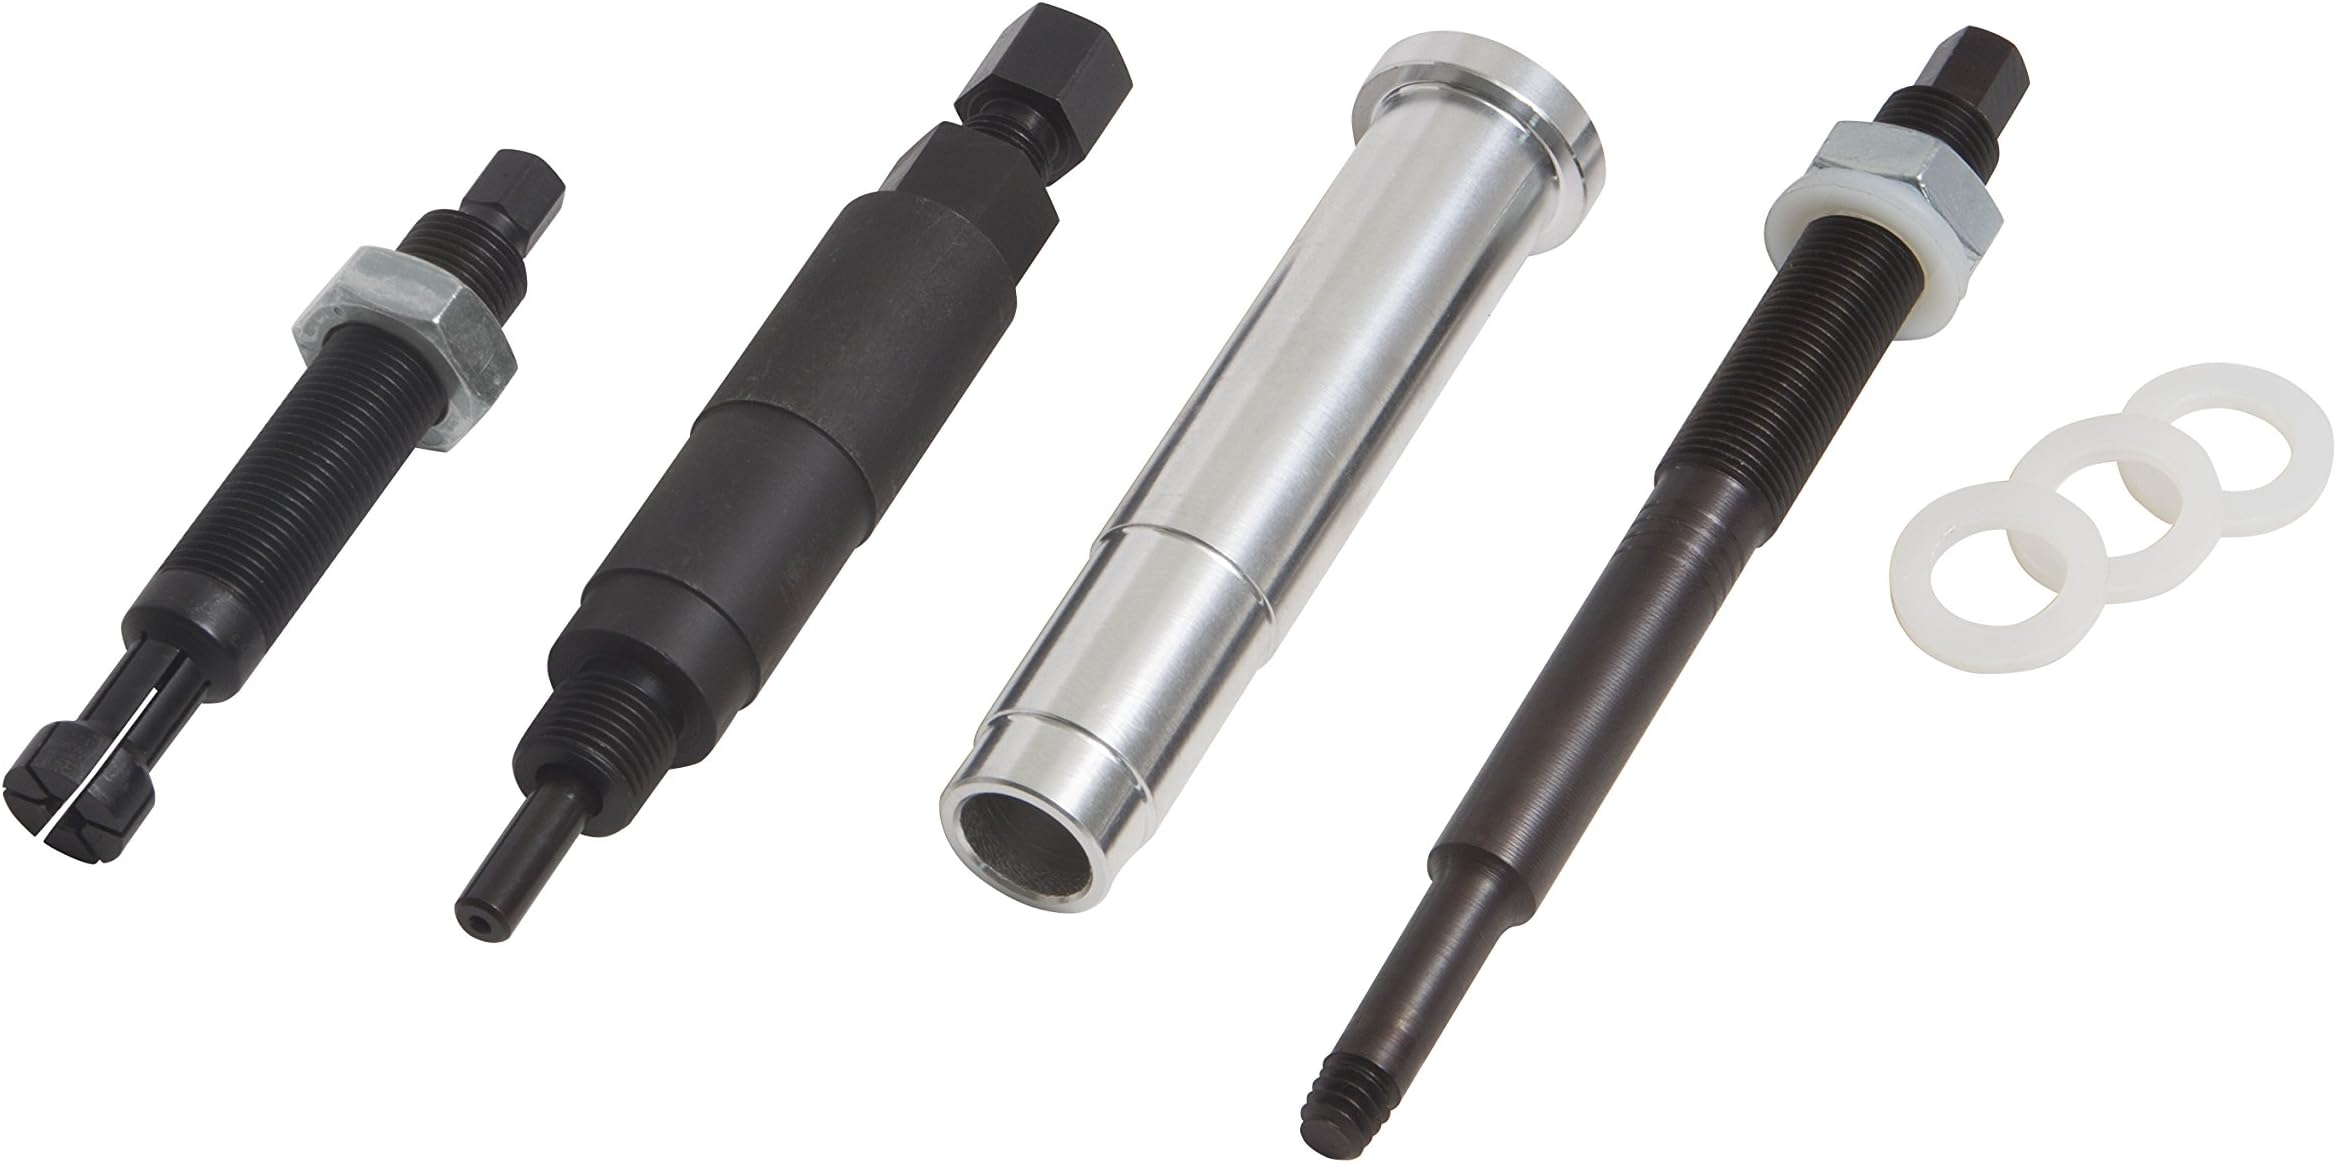
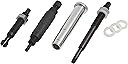
Was skeptical at first. Not product's fault, but was not happy Ford allowed such a thing and didn't take ownership of it and correct it. (Ford F-150, Lariat, Triton 5.4) This product works. It didn't work as "easy" as the video reviewers said it would, but that's OK, it did work. For me, I had to really crank the first part where it breaks the glass inside the spark plug and pushes the tip out the end. It doesn't push it all of the way into your cylinder. I included a picture of what the plug looks like after extraction. (Make sure you blow out the cylinder just in case, it can't hurt. I know I got some debris down inside it from the threaded part of the cylinder head, not the product. Truck burned it right out) After the first part, you have to use the reverse thread piece to "sink" into the top of the remaining spark plug - that's what the picture shows, it is still threaded into the remaining portion of the spark plug. You're supposed to use the included collar/sleeve to guide it down into the top of the spark plug. But no matter how hard I tried, it wasn't gripping it on the first plug. I had to remove the sleeve and guide it into the top of the plug to get it started, then put the sleeve back in the plug hole around the tool. On the second plug, I twisted the left-handed tool more quickly, pushing down and it gripped and worked better. Oops, I did forget to mention, the kit was obviously "USED" when I received it - a return. I imagine some people use it once, then return it. Dock it a star for that - false advertising. But hey, best price in town, half the price as the car parts places charge (Advanced, Autozone, OReilly's, Napa). That is, even if they happen to have it in stock or carry this brand. Watch the Youtube video EPICautoSHOP's version of how to perform this extraction using this tool: "How To Remove A Ford Triton Broken Spark Plug 5.4 L V8", it is by far the best one, easily explaining the process and what to expect. Of course, no video on Youtube explained my issue (or will cover every issue) with it not seating correctly to grip the old remaining piece, but hopefully you have some mechanical skill and can figure out how to navigate simple road blocks like that on your own. As for the Ford haters out there, or the smart aces saying you shouldn't have bought a Ford, all I can say is that we bought the truck used and we love it. Factory lift, drives like a newer truck, goes thru anything, seats 6, cost less than $10k. There's not a vehicle out there that doesn't have some type of quirks and problems. So, I 'll live with this one-time deal because the benefits by far outweigh the deficits.
S**W
Great little tool to recoup for a really crappy design.
This is a 4th gen tool and if you know anything about it, this tool has changed considerably since its initial release. You can tell what generation it is by the 4 etched rings on the extractor shaft. The gen 4 threading tool is made with improved steel and the plunger is upgraded. The tool is high quality and works as advertised. You probably want gen 3 or newer due to puller thread improvements that fix previous breakage issues. Note: Fully tightening the bolt on the ceramic pusher will be too much and there will probably be several full threads left. My technique to determine how far down to go is to pay attention to how far the threaded bolt pushes the pin out from flush as it is tightened. As it is tightened simply count how many turns it takes to push the pin a 1/4" out or so. As I recall this should be 4 or 5 full turns, maybe more. Watch the videos on youtube regarding removing the plugs without breaking them. Keep in mind that what happens when a plug breaks is that the plugs steel casing separates below the threads (they are not welded just swaged together. The end of the plug looks like a bullet and is actually seated in a sleeve in the cylinder head. This rusts in place and therefore it gets stuck and holds tight enough to break the plug bottom loose from the casing. This subsequently breaks the swaged steel casings loose from each other, which breaks the ceramic and the center electrode pin and the plug breaks in two leaving the lower bullet looking end of the plug. The trick to using the tool (actually two tools in one kit) is to push the ceramic down far enough to thread the extractor pin into the steel casing. Also remember that if the electrode pin has to come out before you try to push the ceramic down in the steel casing (steel or black looking end of pin in center of ceramic). Here is how I did the rest of my plugs after I broke 1 on my personal car the other day. I got impatient with my first plug removal. ~Remove the coil and boot (check for moisture). ~Break the plug loose with a 9/16” deep socket and turn about a 1/8th of a turn. ~Spray any carburetor cleaner down the hole and don't be afraid to let it stand an inch or so. Let it set in there for an hour, be patient. The carb cleaner is very thin and will get past the ceramic and will follow the threads down. ~Next, tighten and loosen the plug several times but do not tighten more than the original 1/8" turn from tight. ~~Note: It is ok to do this like 10 times or more just do not attempt to loosen beyond a 1/8th of a turn from tight. The back and for the tightening and loosening helps to allow the cleaner to penetrate. ~Wait as long as you can. I personally sometimes wait overnight but a few hours can suffice if your patient. ~~(This excerpt was taken directly from the Ford TSB) – “Tighten, and then loosen the spark plug, working the plug back and forth. Some screeching and high effort may be noticed. The expected removal torque is about 33 lb-ft (45N•m). Repeat the back and forth turning as needed until turning effort is reduced, and remove the spark plugs.” ~Tip: Once the plugs have soaked, loosen the spark plugs all the way out using an automatic torque wrench set to 33 ft.lbs, that way you cannot over-torque. If it keeps breaking you are over 33ft.lbs, which indicates you should spray some more carb cleaner, or try some penetrant oil down in the hole and let it set again. Keep doing this until it breaks loose at no more than 33ft. lbs. ~If they do not come out you will have to buy and use this tool or pay someone who has one. Here is a link to the TSB: http://www.phila.gov/fleet/Warranty%20Recalls/tsb08-07-06%20FORD.pdf
J**N
Tool works great. Make sure to do your homework, watch Youtube and make sure you have the right sockets.
Saved my a** is what it did..If you are reading this, you are where I was last week..You followed the instructions of the TSB to a tee, or perhaps watched a Youtube video or three, and you STILL broke the dang thing off, or perhaps more than one. One in my case. 2005 Mustang GT, left side plug against the firewall..First I tried to borrow one. Couldn't find anyone who had one. Then I read that they wear out, and if you use a worn one, it may not pull it. Not worth the risk since this one here is the cheapest you can get. First thing, you want to make sure you have the correct sockets. I can't remember the size but I think the large nut is perhaps 1". Get a deep socket because when you turn the nut, it pulls the puller up and all of a sudden you've run out of socket. Back to the process. It worked just like the youtube video said it would. One guy talked about the concentric rings that are machined into the pulling die. Apparently there have been revisions, because the early ones broke easy. This on had four rings so this must be version 4.0. I knew this was a do or die job so I really took my time. Contemplated a glass of Merlot beforehand, but thought better of it. Blew the crap out of the spark plug hole then threaded the porcelain pusher into the sparkplug threads. From what I have read, I was lucky. My center electrode broke off way down in so nothing was sticking out. I slowly started cranking on the pusher nut and it got really hard to turn, then "CRACK"! I heard the porcelain break loose. I noted how far up the pusher was as far as threads and it looked to be longer than the electrode. I have to admit, I chickened out a bit. I didn't want to risk pushing the plug tip into the cylinder so I backed it out before it bottomed out. Have to remember, they make this thing long enough so if the porcelain breaks way down in the tip, you have enough to push with. Use your judgement based on how much you have down in there to push against. Mine was almost flush. Glad I did, because it had pushed the porcelain WAY down into the tip and in fact snapped the ground strap. So I then blew out the hole again really good and then dropped the sleeve into the hole and began threading the die into the plug shell. It doesn't turn very much before it gets really hard. Having seen the videos of how to get them out after the die snaps, I was careful. Once it got tight, just a slight push more. Then the big socket came in to play. I didn't have a deep socket so used a regular one. Started turning VERY slowly an heard the "POP" as the shell broke loose. Like one guy said in a video, that's a good sound. Kept turning then all of a sudden the socket slipped off. I didn't have the deep socket so we had to hold the socket and barely put the tip of the 1/2" driver into the end of the socket. The head of the puller was right almost to the top of the socket hole before it fully pulled loose but at least I didn't have to run to the store for a socket for that last turn or two. Pulled it up, and low and behold, the tip was on the tip of the die! Make sure when you put those new plugs in, that you put the appropriate anti seize compound on. I used copper, because that is what I had. You put a light coating on the electrode shaft (the silver part that got stuck the first time) so hopefully next time this won't happen. Also your new plugs are likely one piece. Also don't forget your torque wrench. Take your time, be careful and you should be okay. Watch every Youtube video you can at least twice and thank Ford for such a lovely design. As for the tool, very well made, USA made in fact. Comes in a plastic storage box and a sheet of instructions that are very hard to understand. Thank goodness for Youtube! Good luck. Hope this was helpful, if so please click yes below!
S**N
Lisle Broken Spark Plug Remover
I very rarely write product reviews, but I was so impressed with this tool that here I am, writing a review. I don't know who designed the spark plugs or the seating arrangement for the Triton 3v engine, but if I ever meet him I'll shake him warmly by the neck because it's a horrible piece of engineering. Despite being as careful as I possibly could, I was left with 3 out of 8 plugs broken and stuck in the engine with no clue about how to remove them without a very expensive trip to the garage. Luckily, a friend mentioned that there was a tool available that was specifically designed for this problem so a quick Google took me to Amazon and a selection of tools for this job. I picked the 'Lisle (LIS65600) Broken Spark Plug Remover for Ford Triton 3 Valve Engines' based on the number and quality of the reviews and sent in my order. I used the expedited shipping option, which was a no brainer as my truck was immobile while it sat with 3 broken plugs. Delivery was reasonably fast - I ordered on Sunday and the tool was at my door on Wednesday; no complaints there. On opening the package, I find that the tool is actually 2 tools, one for each step in the removal process and is housed in its own sturdy plastic box with instructions (both written and pictorial) which were easy to follow and a few spare nylon washers. Everything was well made and I was able to put it to work straight away. I was curious about how the tool would work until I was able to hold it and figure it out - it's pretty simple and very effective. The first tool is used to push the ceramic down through the plug to leave a gap between the ceramic and the top of the stuck sleeve. The second tool is screwed down into this gap, cutting a thread into the inside of the plug sleeve and gripping in firmly. Then it's just a matter of turning the nut that pulls on the threaded section, withdrawing it and the broken plug from the engine. I cannot overstate how easy this tool was to use and how effective it was in removing the broken plugs! From starting the process to standing with the extracted broken plug in my hand took around 10 minutes per plug. The ONLY thing I would mention with this item is that because there isn't a lot of room in an engine bay to turn a wrench you'll need to have a set of deep sockets available. A well made tool, very good price, quick delivery and it performed exactly as advertised without any fuss. I'm almost looking forward to the next plug change so I can use it again!
Trustpilot
1 week ago
5 days ago